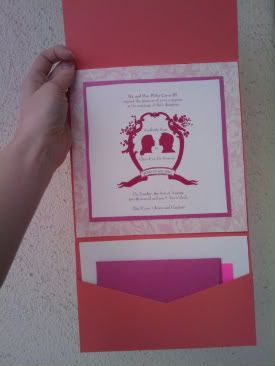
(An incomplete draft. Ignore the pink post-it on the bottom behind the envelope)
Follow me on a little, scratch that, long- Lord of the Rings- status, journey called "Making Custom Invitations".
- Step 1: Ponder designs and wedding colors. Think about having a heart shaped invite and envelope.
- Step 2: Re-ponder designs after looking at more pictures online. Decide you want a antique bookplate feel.
- Step 3: Go through over 50 paper sample books in father's office. Grow cranky when asked to look at more.
- Step 4: Pick out paper. (In this case, Francis Orr provided a company where I picked out
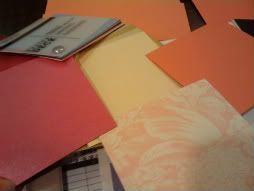 the bones of the invite because I couldn't find any colors I liked in our sample books.) I was presented with a bajillion swatches and went from there, mixing, matching and figuring which paper would comprise each piece of the invite-extravaganza.
- Step 5: Write the verbage!
There is a lot more to this than one would think. An invite not only gives the gory details of the wedding, but it is also a tiny advertisement for who is really paying for the shindig. I think that's more than fair. If you don't contribute significantly, or aren't the ones getting hitched, your name isn't on the invite.
Also there's an order to things. Turns out, I don't request "the honor of your presence" unless the ceremony is in a church. Otherwise it's "the pleasure of your company". Also it's Heatherly Rose to Chaz-Eric Denaranjo. "And" is straight out and "with" is only for Jewish ceremonies (La chaim!). Dress code is to be on the bottom right of the card, if relevant. (Turns out "white tie" is infinitely fancier than "black tie").
- Step 6: Design!
This is the fun part. Well fun when I wasn't frustrated by my lack of clarity. The graphic artistof our company had me look at vector art stock, which is basically drawing stock as opposed to photos. I could pick out pieces and then have her edit them to my heart's delight.

In a stroke of genius (or vanity) I had her make silhouettes of Chaz and I in profile from photos. I had done a version of Chaz myself with just photo-bucket to test out the theory. turns out this is a pretty popular motif at weddings lately. I think it's charming, so I'm all for it. If it's good enough for the Victorian era, it's good enough for me.
So we have vector stock, our silhouettes, a graphic artist and me over-seeing the whole thing. At first, you have designer's zeal and a burning vision. Everything will be perfect. After 20+ hours (literally) thinking about it and 5 drafts, you get to a "yeah, yeah, great just stick it on there" mindset. I think I only lost the vision for the flourishes around my address. Something tells me the design will survive.
- Step 7: The Printing Process
Printing is a serious and complicated business. If you want the ultimate in swank, it's all

about letterpress.
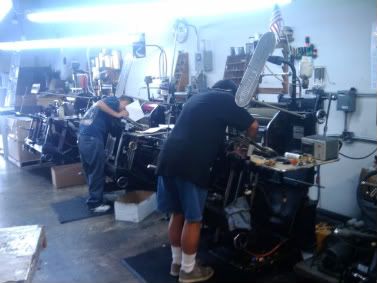
Letterpress is a form of printing where you make a metal stamp or "die" with wood backing of your text and images. Each color requires a different die. Using a massive machine, ink is literally pressed into the paper giving an elegant "debossing" effect. If you're really posh in the printing world (and I am! ;-) ) you press it once, let it dry, then press it again for an even deeper imprint.
Foiling is another foofy effect that can be done. This stuff that looks like shiny wrapping
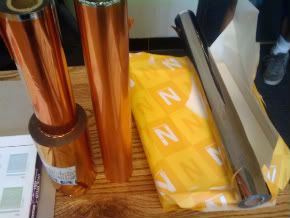
paper is heated to kinda melt onto the paper in the design you want. This creates an "ooo shiny" image. The dies for these are all metal.
So first you have the design, then you have a company make dies from them, then you send these dies to the guys with the letterpress and foiling machines with all your paper. You pick out ink and foil colors and, voici! Custom invites.

Now I just have to assemble the pieces, address and stamp them all.... They're a work in progress, but I hope this little printing lesson taught you something. Or at least explains my few days tardiness ;-)
No comments:
Post a Comment